Tank Mockups
Designing the new tanks
Sizing the new tanks
Once the old tank was out, old mounts removed, and everything cleaned up, it was time to figure out what the new tank(s) would look like.
The access hole under the table was 25 inches wide; there was enough space to enlarge this opening to 36 inches by increasing the opening by 5 inches aft and 6 inches forward. This would allow three tanks three feet in length; I was planning on hiring a shipwright to redesign the cabin sole to allow larger floor board access.
However, the distance between the aft end of the existing opening and the aft bulkhead was 74 inches. Removing an additional 5 inches from the aft end of the opening would leave a distance not an even multiple of three feet. I would end up with one 36" tank, one 32" tank, followed by a 36" tank - total length of 8'8". Assuming I would maintain the same approximate cross-sectional area, I would lose almost 14% of my total capacity. I decided that this was too much to make up by flaring the tops of the tanks or otherwise increasing the cross sectional area.
I could make up the missing capacity by adding another tank forward of the opening, a tank approxiametly 20" in length. I would now have four tanks of varying length and a new opening in the floor requiring additional work by a shipwright. It was noted that the current opening would allow an exact fit of five tanks, each 25" in length. A quick calculation showed this option produced a volume greater than original.
Let's think about this. I was anticipating three tanks from the beginning, the number grew to four maintaing original capacity, and I was resisting the idea of five tanks, which would preserve the original configuration of the floor. So what's the difference between three tanks and five? CFR 183 requires that the engine's fuel line return to the same tank supplying the fuel - I was either going to have multiple manifolds, a lot of plumbing, or needed to draw off a day tank and install a transfer pump (a bit less plumbing). The latter was attractive because one of my goals was an isolated day tank providing known clean fuel. After accepting the idea of a day tank, the issue became the number of storage tanks. Once committed to a transfer pump, there is little practical difference between two or four storage tanks - just a slightly larger manifold. The more I thought about it, the more I warmed to the idea of five tanks.
Each tank would be inserted under the floor at the table pedestal opening and slid into place.
Additional advantages of five tanks include no required modification to the cabin sole and ease of future removal for tank maintenance or accessibility.
Mockups
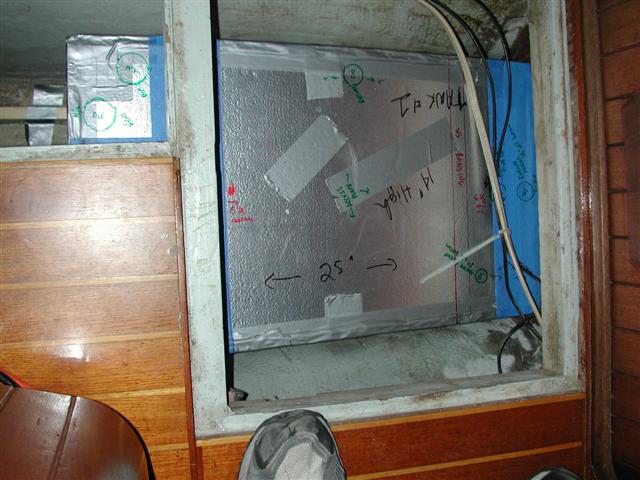
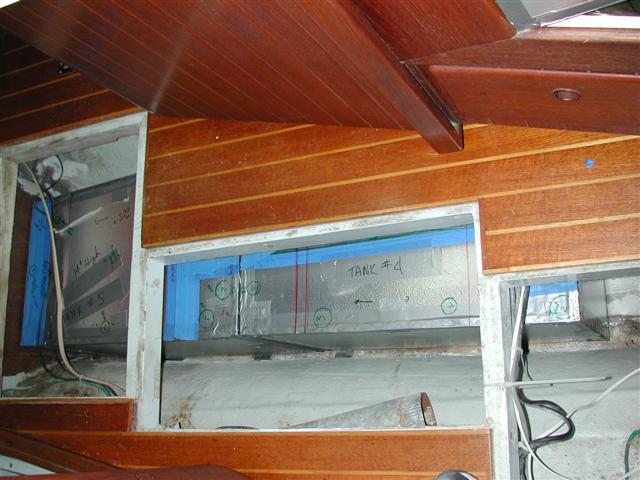
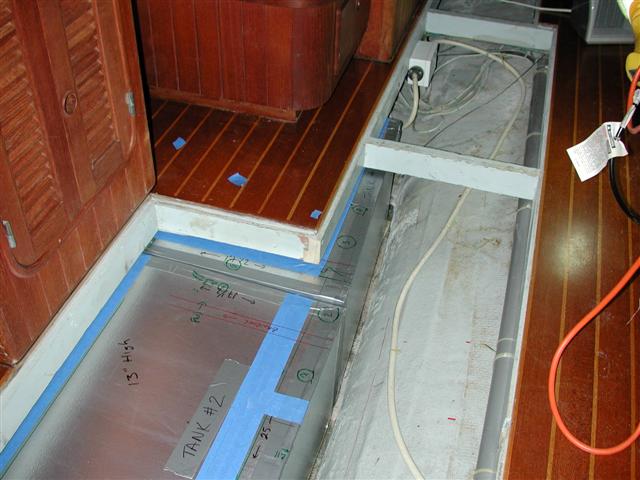
First I made cardboard cross-sections based on the opening under the table and the height available to slide the tanks into place. I originally assumed a 2-1/2" tank mount height, later revised to as little as 3/8" to allow more height for the first tank.I then determined the appropriate size for rectangular mockups of the various tanks, changing the tank dimensions to use the available width of the bilge most efficiently. I made the mockups out of 1/2" styrofoam foundation insulation with a mylar film on one side. Using duct tape to bond the sides, I was able to create light but stiff mockups.
The total anticipated volume of the new tanks was ~115 gallons. The mockups allowed easy modification with a razor knife and duct tape. I modified the anticipated height of the tank mounts and shortened two of the tanks, taking my total capacity down to 109.45 gallons, almost exactly the original capacity.
Once I was confident of the fit, I marked the tops of the tanks with blue tape for areas of limited clearance and marked locations for all fittings. I planned on 1/4" nitrile rubber between the tanks and included this in the calculations. CFR 183 requires the tanks be secured in such a way they can move no more than 1/4". I decided on stainless steel strapping for the hold downs and marked this on the mockups to ensure no interference from tank fittings. I transferred these locations to the side of the bilge.

Day Tank - Note the tank numbering was later reversed - the day tank became Tank #5
I used wood strips to represent the mounts under the tanks.

Mockups of Tanks 4 & 5

Tanks 1 And 2
Back to Bilge Prep Page